

What is THE Twitter PIXEL?
The Twitter Pixel is a piece of code placed on the Events Promotion Page that collects data from visitors that land on this page. This data will help you build targeted audiences for future ads and re-engage fans who have already taken some kind of action on your Promo Page.
Summary
Click on one of the topics below to learn more:
What data does the twitter Pixel collect?
The Twitter Pixel will collect the following information from your Promo Page visitors:
Ad/ Event information:
Information about the ad a Twitter user has clicked or an event that was triggered (i.e. Click on a specific CTA on your Promo Page).
Timestamp:
Time that the pixel event fired. This is used to determine when the Promotion Page actions took place, like when a page was viewed, when a button was clicked, etc.
IP Address:
Used to determine the geographic location of an event.
User Agent:
Used to determine the device make, model, operating system and browser information.
Creating a twitter Pixel:
Note: These instructions assume that you already have a Twitter Ads account for ads.
Step 1

Log into your Twitter Ads account and, under Tools, select Conversion tracking.
(If you’re not seeing a Tools tab in your account, this is likely because a credit card hasn’t been added. Find how to add one here.
Step 2

After agreeing to Twitter’s Terms and Conditions, click the Generate a website tag for conversion tracking button.
Step 3
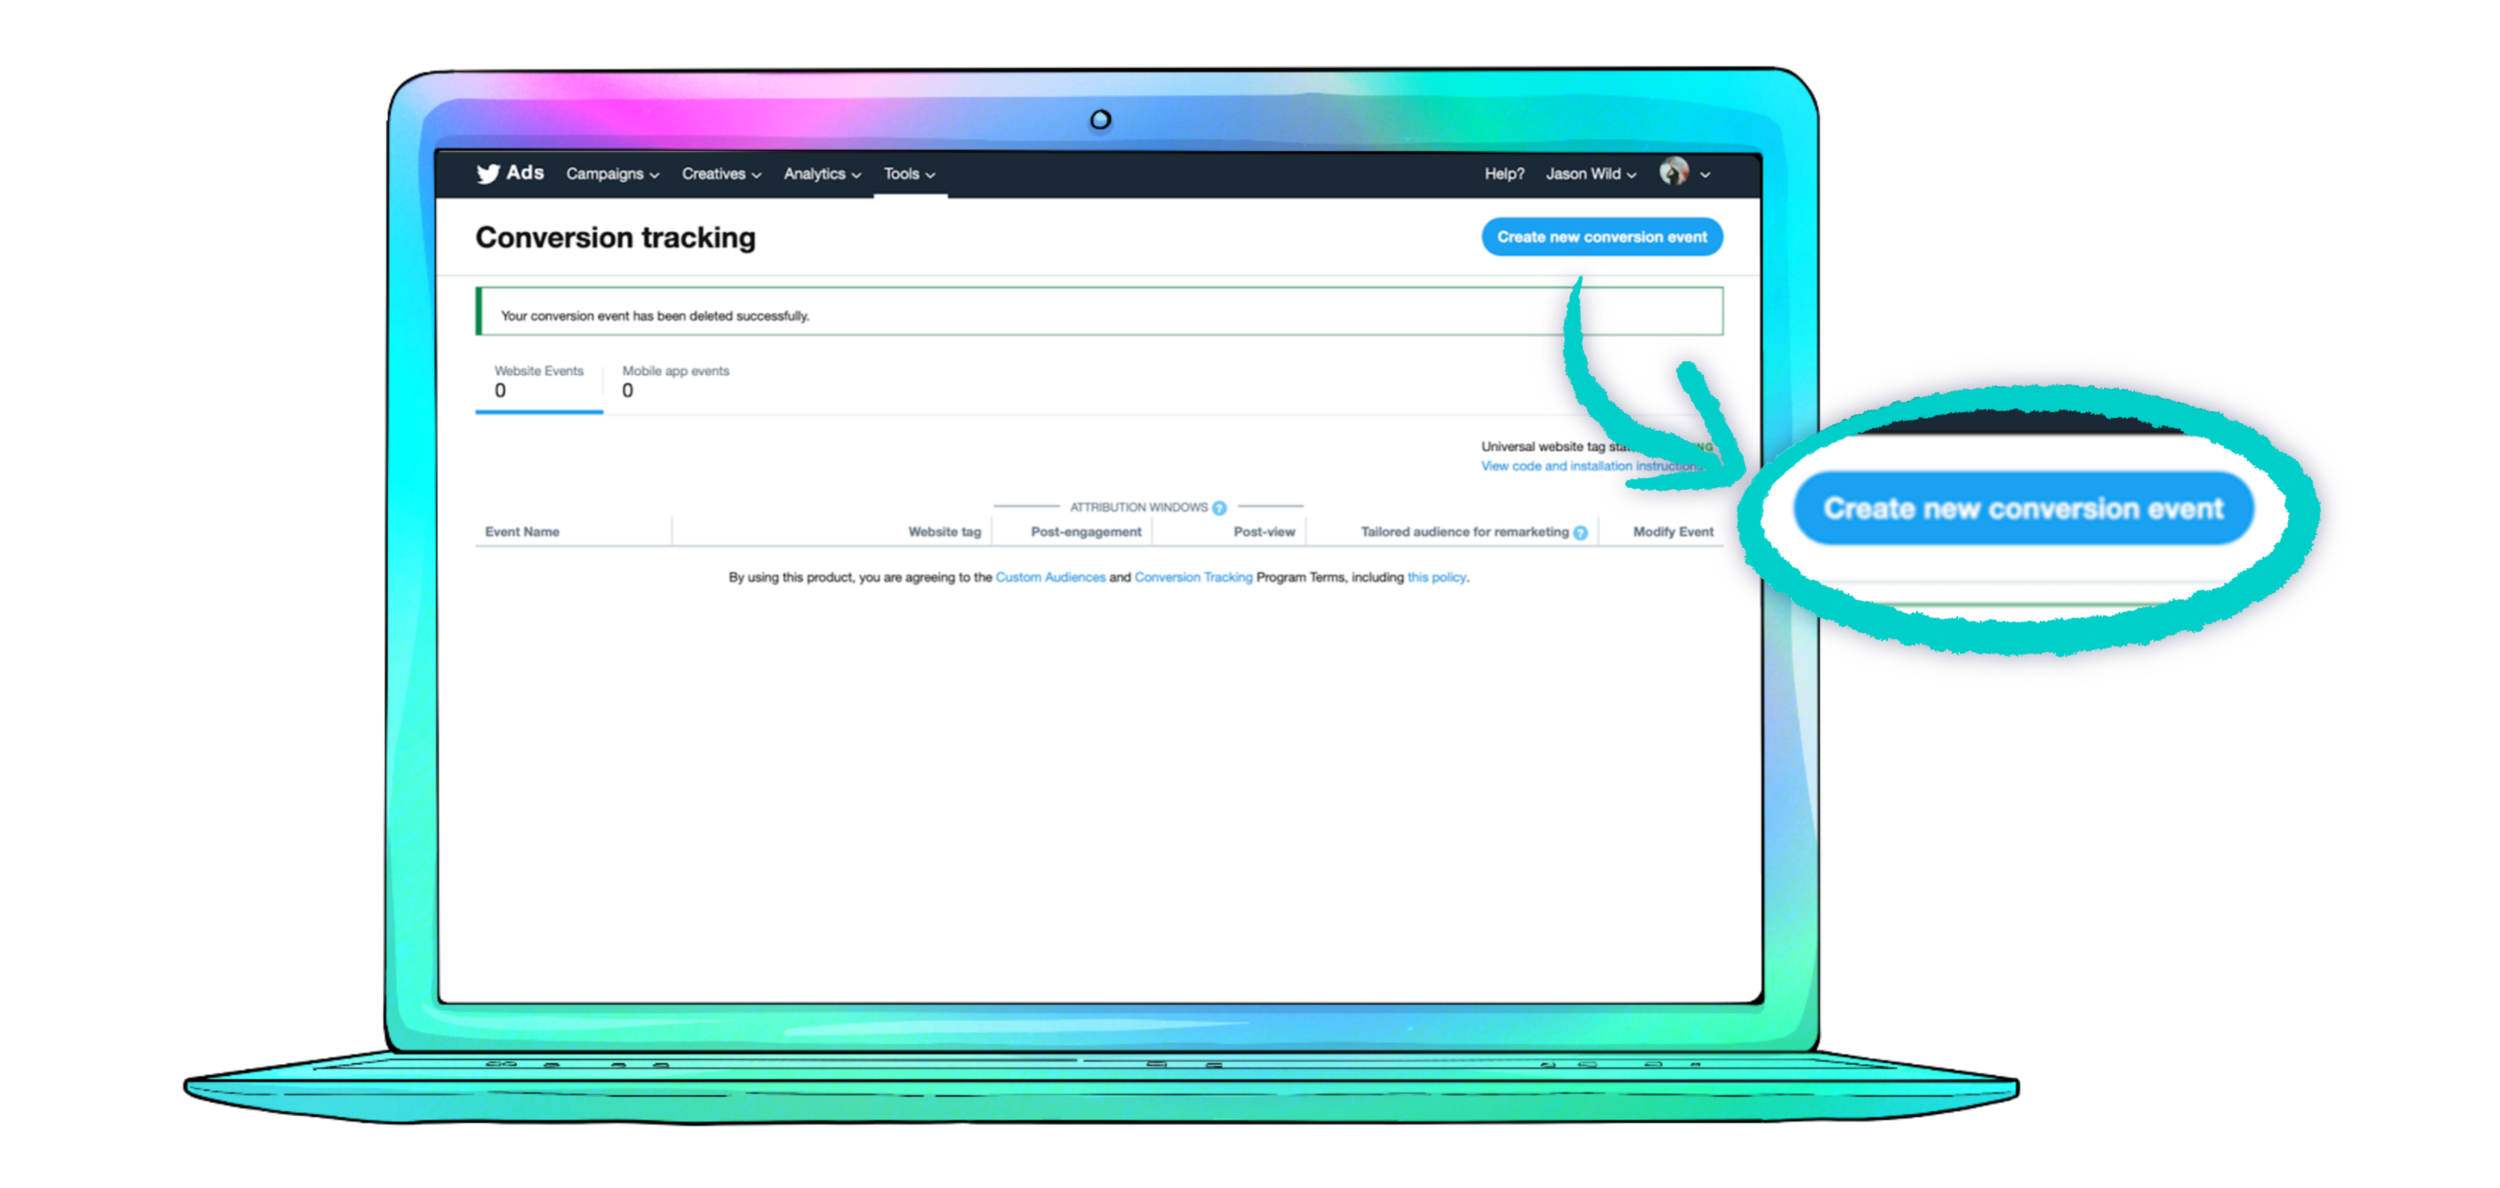
In order to track your Promo Page activity, you’ll need to create a conversion event for each action you want to track (i.e. fans that viewed your Promotion Page, clicked on the Track button, etc.). From the Conversion tracking page, click the Create new conversion event button.

Name your new event and choose Site visit from the dropdown menu. Under the second section, select the URL contains option and paste your Promo Page unique URL. Configure the additional details and, when set, click on Save conversion event.
Adding and testing the twitter Pixel ID on the Promotion Page:
These next steps will help you ensure the tracking pixel properly works and gathers the intended data from visitors that land on your Promotion Page.
Note: To facilitate testing, all processes are made on Google Chrome.
STEP 1

Once your event has been created, on the Conversion tracking page, copy the Website Tag ID under the event name.
STEP 2

On the Promotion Page configuration page, paste the Twitter Pixel ID on the Twitter Ads Pixel field and copy your unique URL.
STEP 3
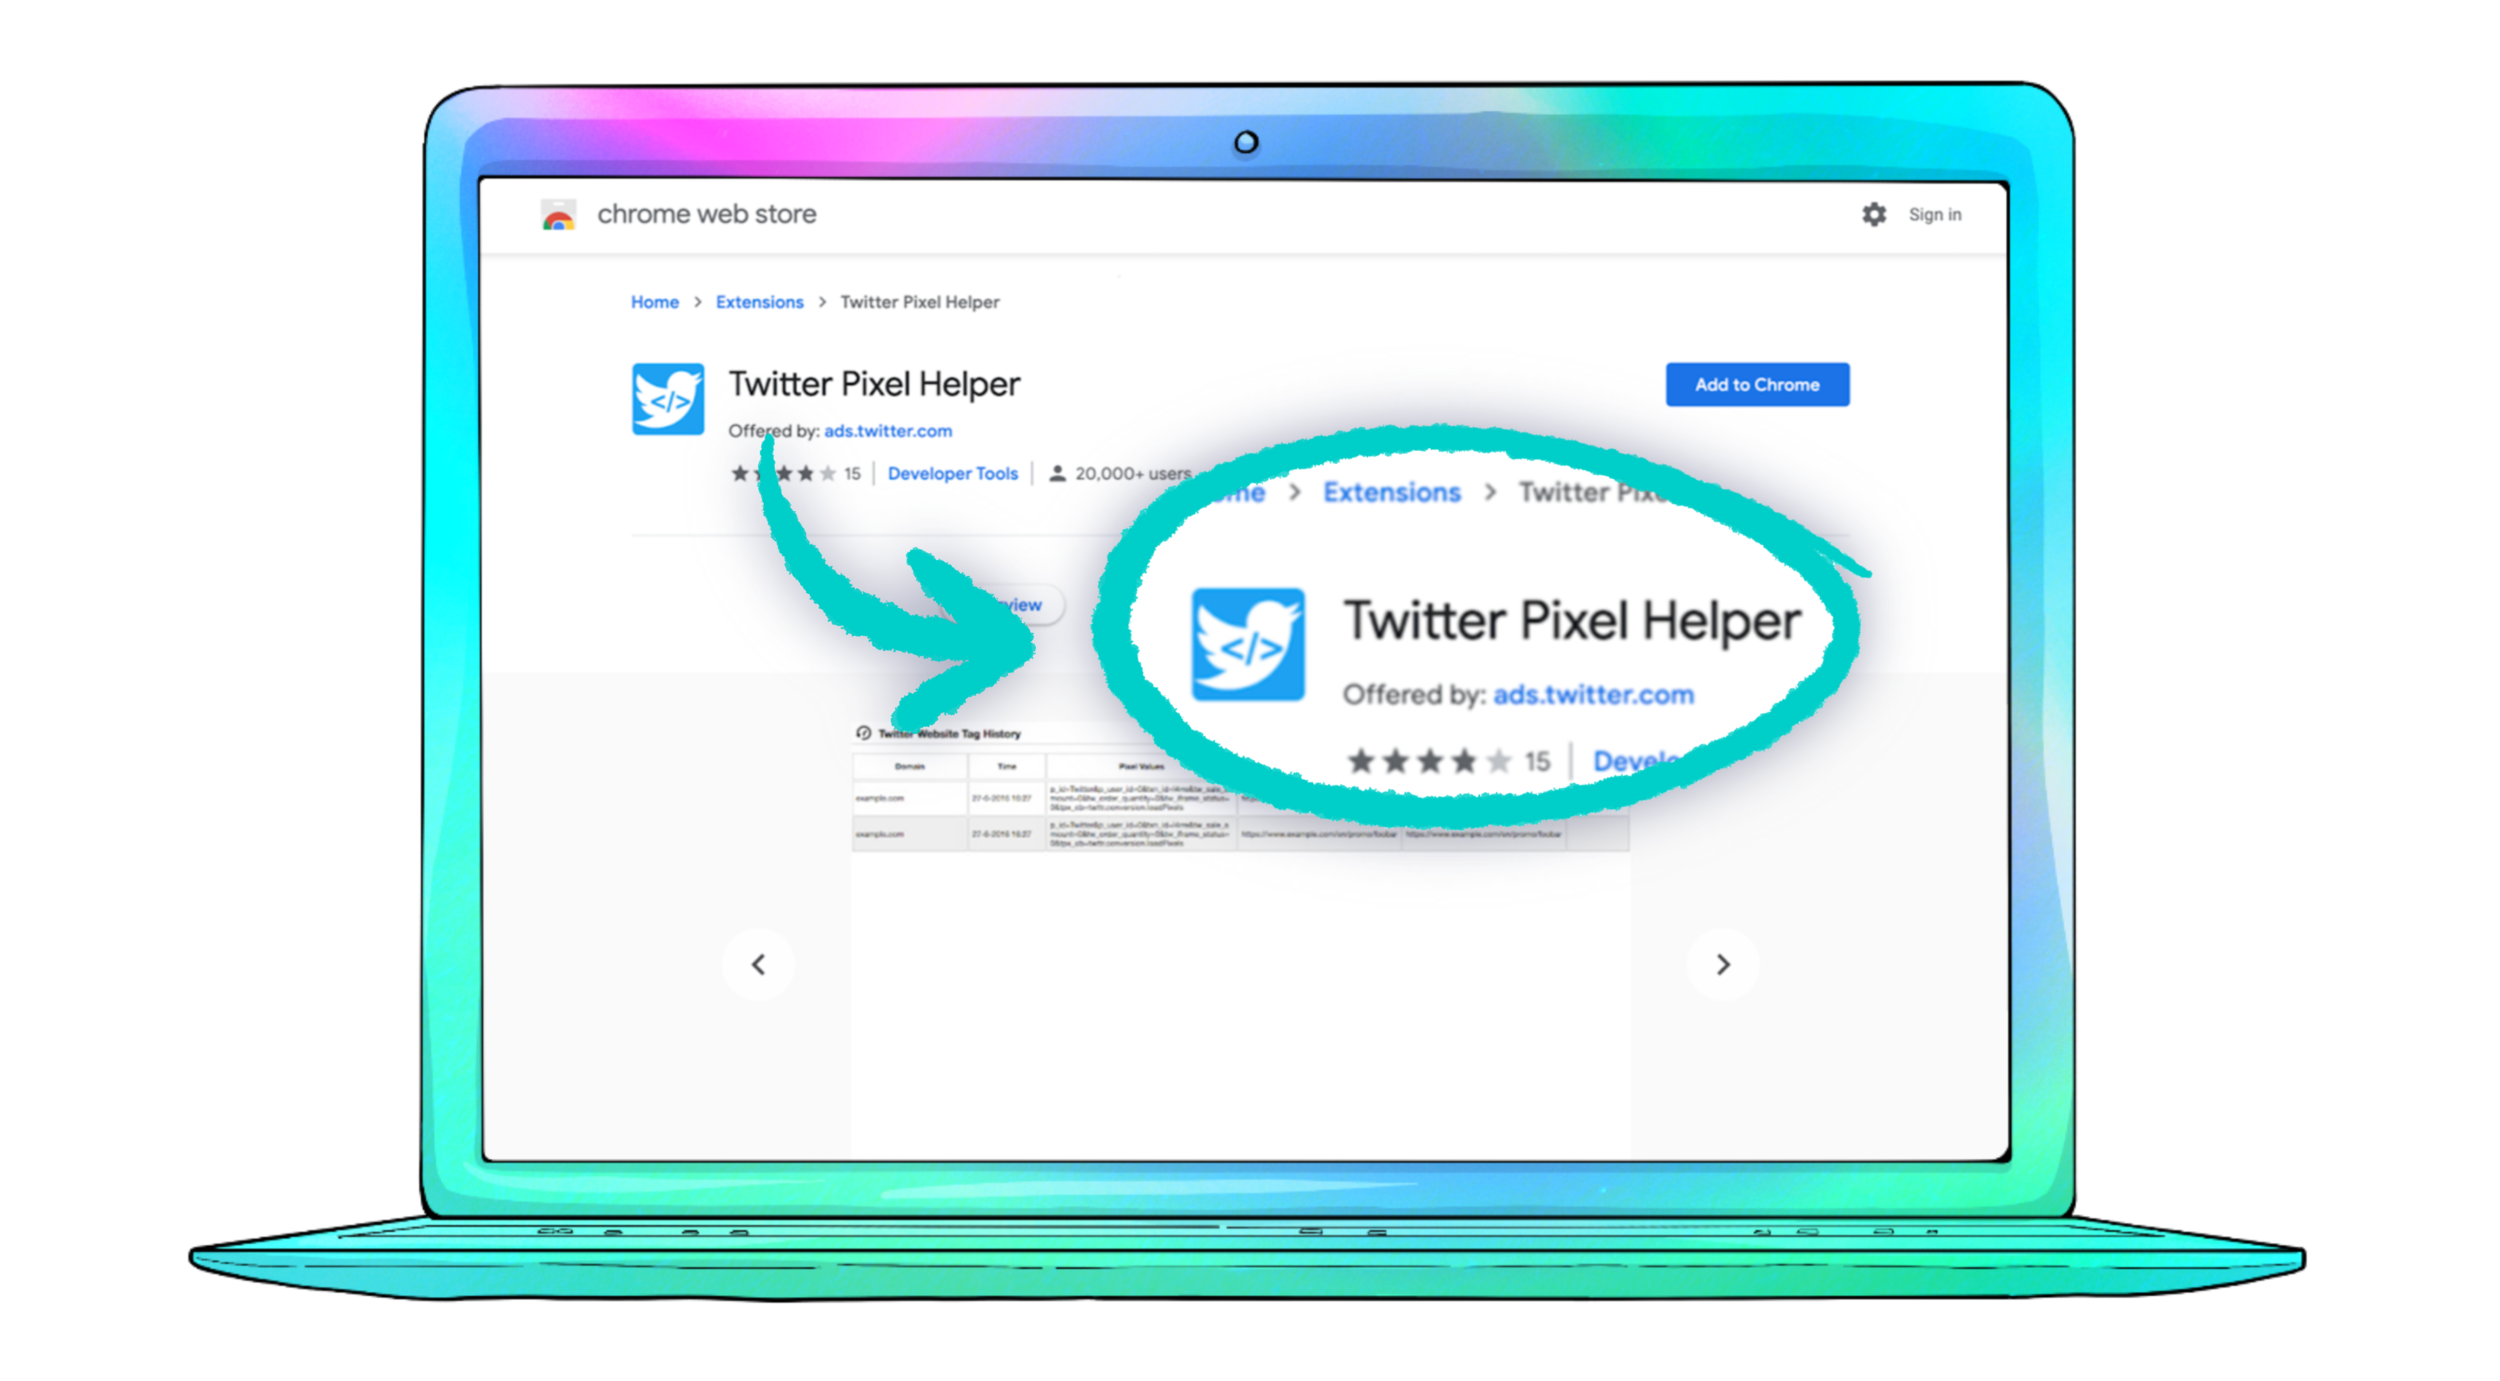
On Google Chrome, install the Twitter Pixel Helper.
STEP 4

Paste the link on the Google Chrome browser tab and check that, when loading the Promo Page, it correctly triggers the Twitter Website Tag on the Twitter Pixel Helper extension.
Creating a twitter Retargeting Audience
When you’re ready to set up your Twitter retargeting campaign to re-engage users that have visited your Promo Page and push them a step further, follow these steps:
STEP 1

Navigate to Tools on the upper menu bar and click on Audiences.
STEP 2
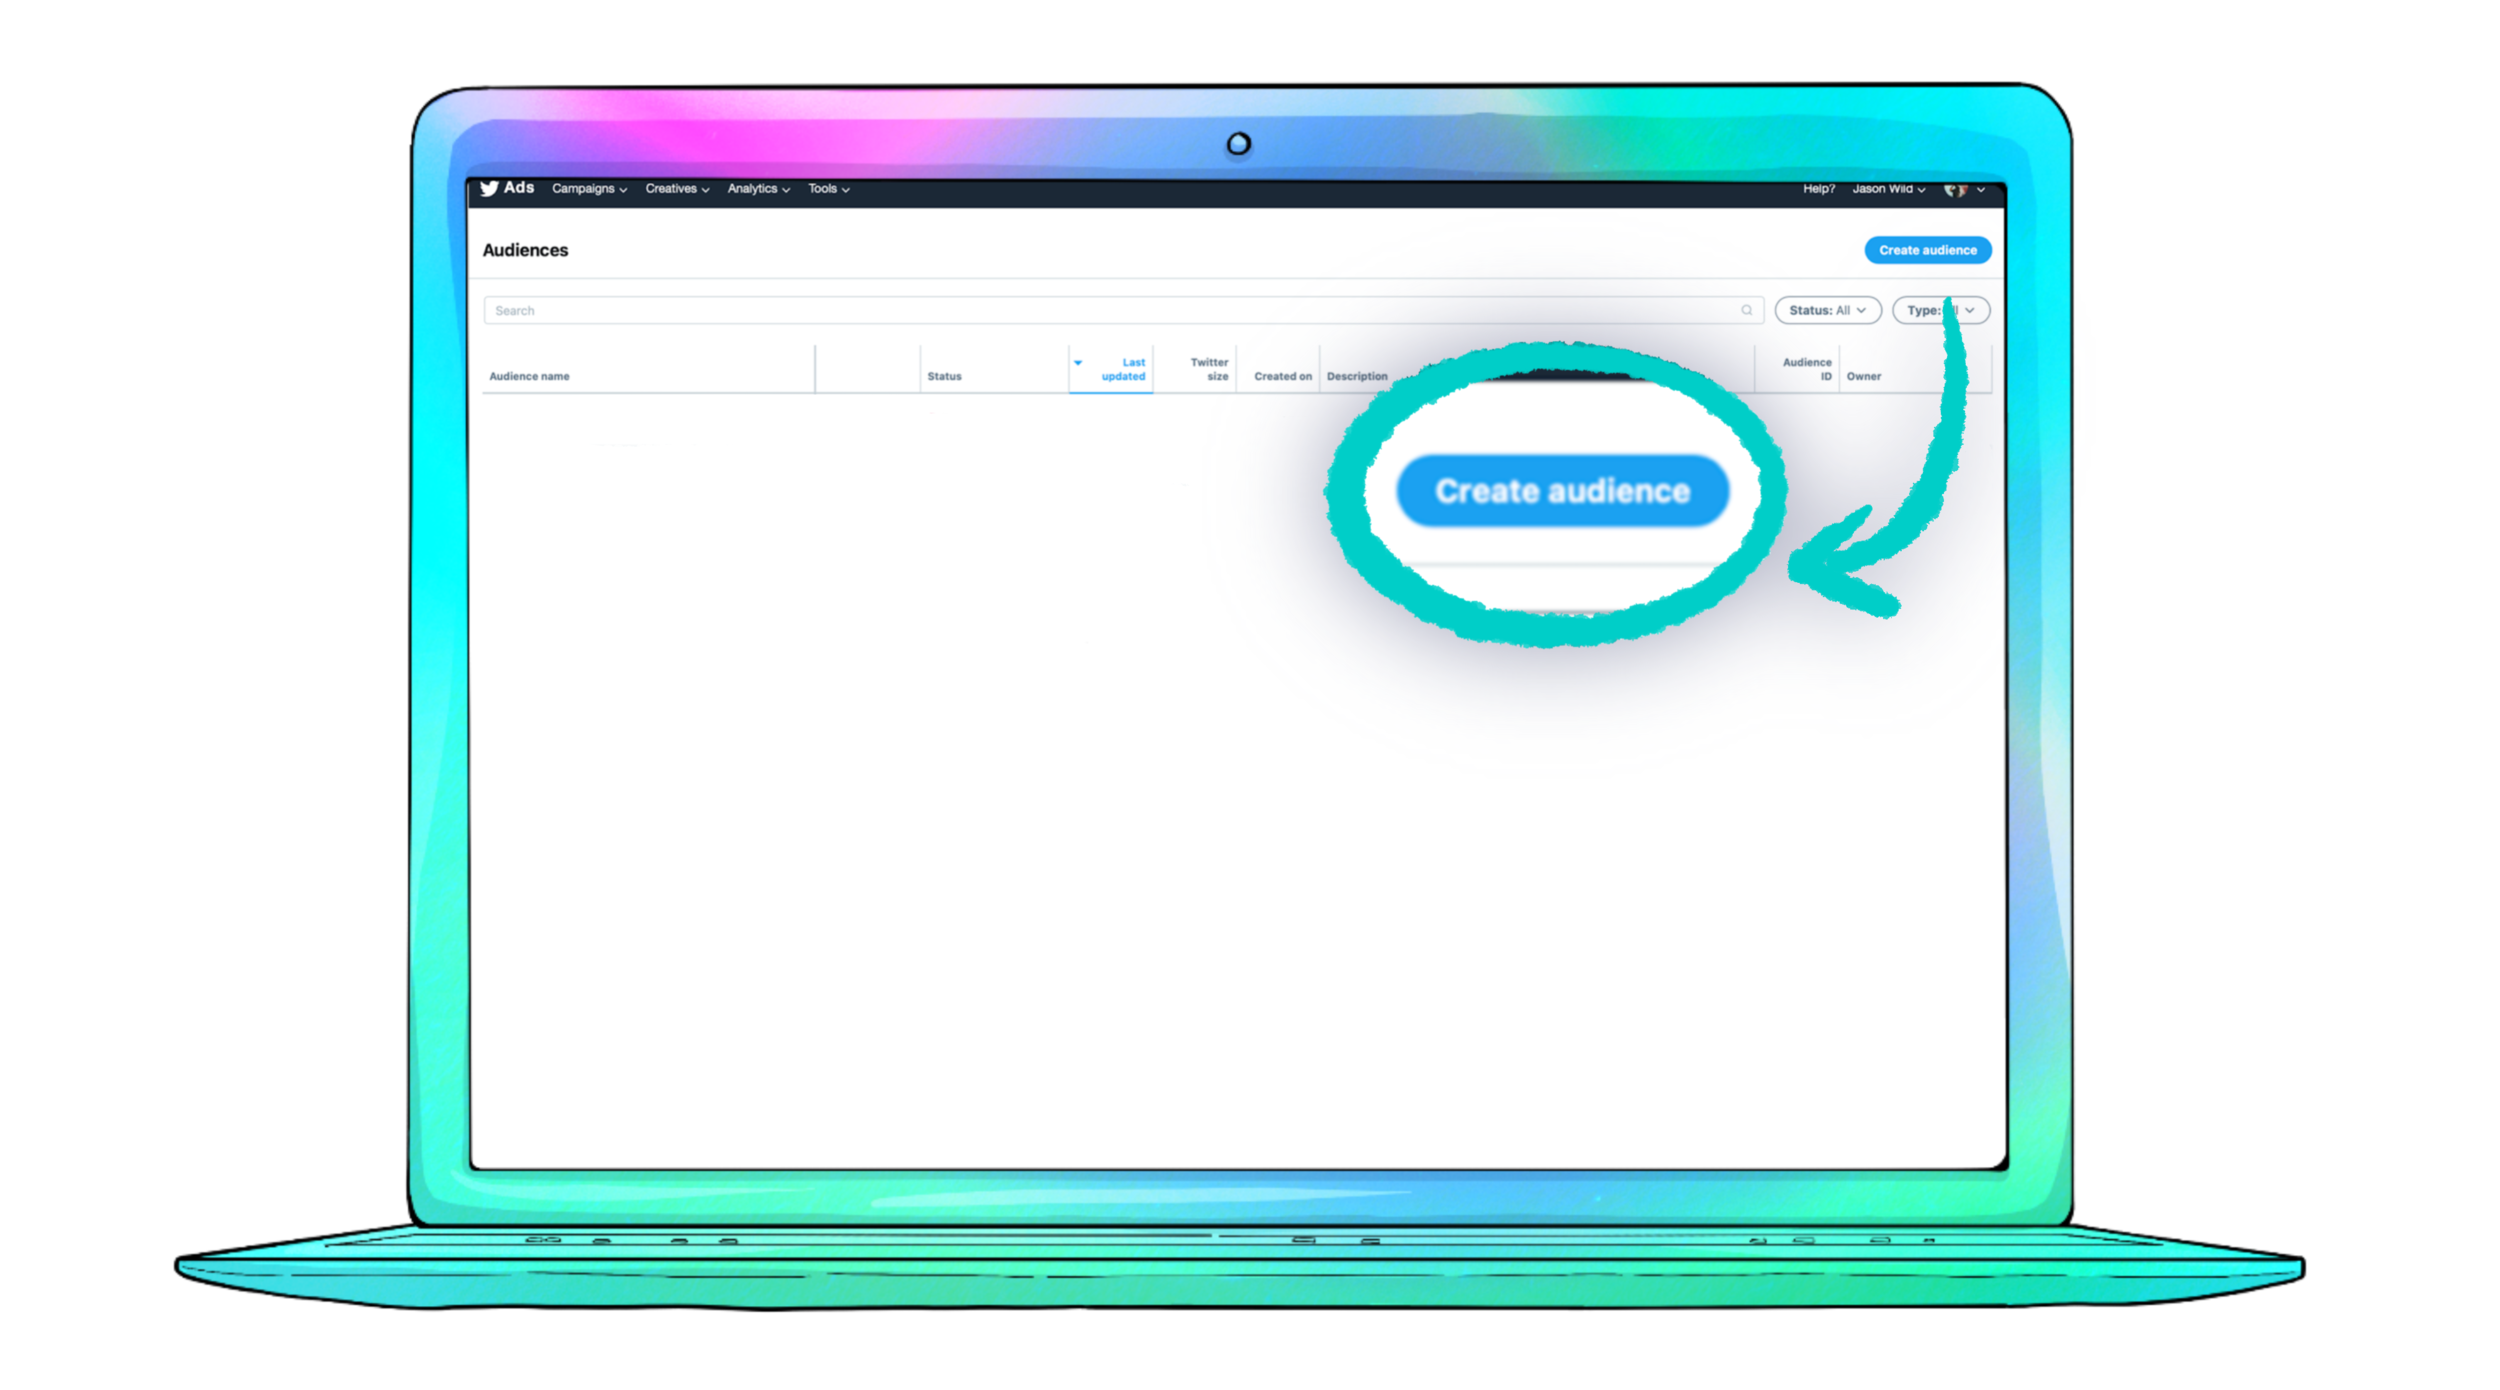
Click on the Create audience button on the upper right side.
STEP 3

Select the Website activity option in order to target users that have visited your Promo Page.
STEP 4

Name your audience and, under Audience rules, choose Visitors to a specific webpage and paste your Events Promotion Page URL on the Website URL field. Make sure the option Contains is selected. Once ready, click on the Create audience button and you’re set!